Peanut Butter Balls are delicious no-bake bites that are perfect for a quick snack or indulgent dessert. Blending creamy peanut butter with melted chocolate, they are easy to make and suitable for all levels of cooks.
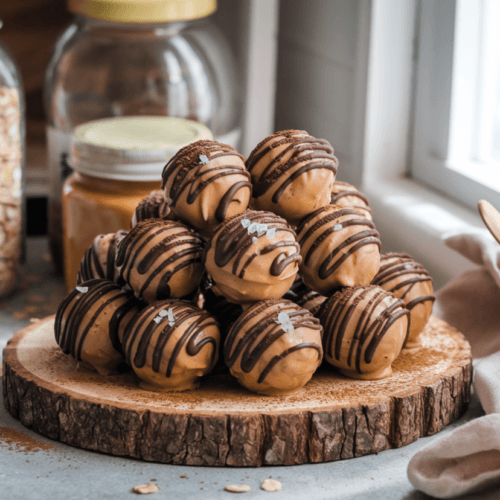
Peanut Butter Balls
Equipment
- Grand was
- Spatula
- Baking sheet
- Parchment paper
Ingredients
- 200 g Creamy peanut butter
- 150 g Icing sugar
- 50 g Melted butter
- 200 g Dark (or milk chocolate)
- Pinch of salt (optional)
Instructions
- Step 1: Preparing the baseIn a large bowl, mix together the peanut butter, icing sugar and melted butter.Stir until you get a smooth paste.
- Step 2: Form the ballsTake a small amount of dough and roll it between your hands to form uniformly sized balls.Arrange the pieces on a parchment-lined baking tray.
- Step 3: Prepare the chocolate coatingMelt the chocolate in a bain-marie or in the microwave, stirring regularly to prevent it from burning.Use a fork or toothpick to coat each ball in the melted chocolate.
- Step 4: RefrigerationPlace the coated balls back on the baking sheet and refrigerate for about 30 minutes, or until the chocolate hardens.
Notes
- You can replace the peanut butter with almond butter or hazelnut paste depending on your preference.
- For a version without refined sugar, use maple syrup or honey and adjust the texture of the dough with a little more peanut butter.
- Add decorations like nut pieces, chocolate chips or seeds before the chocolate hardens to personalize your balls.
Table of Contents
Table of Contents
| Section | Details |
|---|---|
| 1-Introduction | Introducing the recipe and why it’s popular |
| 2-Essential equipment | Equipment required to successfully complete the recipe |
| 3-Step-by-Step Instructions | Detailed step-by-step instructions |
| 4-What Are Peanut Butter Balls? | Sweet bites with chocolatey peanut butter. |
| 5-Nutritional value and calories | Complete analysis of nutritional contributions |
| 6-Tips and variations | Notes for customizing the recipe |
| 7-FAQ sur les Peanut Butter Balls | Answers to frequently asked questions |
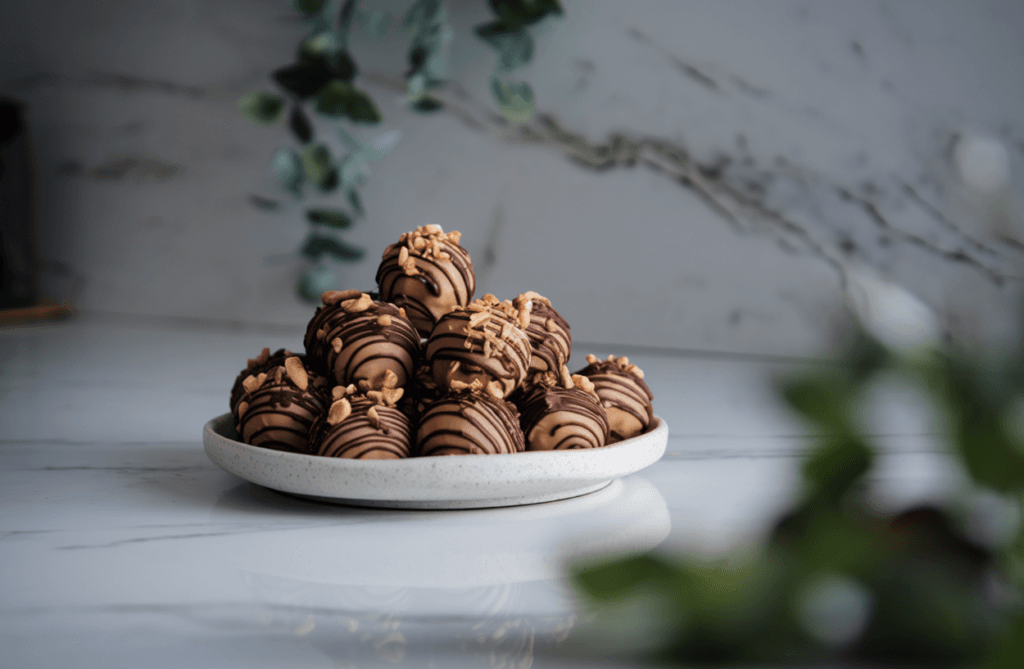
1-Introduction
Peanut Butter Balls are a classic American dessert, cherished for their ease of preparation, delightful taste, and adaptability. Whether enjoyed during festive celebrations or as a quick everyday treat, their smooth peanut butter center paired with a luscious chocolate coating makes them a beloved favorite nationwide. But what exactly gives them their irresistible appeal? The answer lies in the ingredients. By thoughtfully choosing and blending the right components, you can transform this traditional treat into a gourmet indulgence.
This guide will explore every essential ingredient, providing you with the tools to craft the perfect Peanut Butter Balls that suit contemporary flavors and dietary preferences.
Base Ingredients
Peanut Butter
Peanut butter is the heart of this recipe, providing flavor, texture, and structure.
- Types of Peanut Butter: Creamy varieties work best for a smooth texture, while chunky peanut butter adds delightful bits of crunch.
- Choosing the Right Brand: Opt for natural peanut butter with minimal ingredients, such as peanuts and salt, for a rich, authentic flavor.
- Health Benefits: Peanut butter is packed with protein, healthy fats, and essential nutrients, making it a satisfying choice.
- Tips: Avoid peanut butter with added oils or sugars, as they can alter the consistency and flavor balance.
Sweeteners
Sweeteners are essential for balancing the nutty taste of peanut butter.
- Powdered Sugar: The most common choice, it dissolves easily and ensures a smooth texture.
- Granulated Sugar: Adds a touch of texture but requires more mixing for a cohesive blend.
- Alternatives: Maple syrup, honey, or agave nectar can be used for natural sweetness but may slightly alter the dough’s firmness.
Binding Agents
Butter
Butter enhances the flavor and helps hold the mixture together.
- Salted vs. Unsalted: Unsalted butter is preferred to control the salt content in the recipe.
- Substitutes: Coconut oil or vegan butter alternatives work well for those with dietary restrictions.
- Room Temperature Tips: Ensure the butter is softened for easy mixing.
Textural Enhancements
Crunchy Add-Ins
To elevate the texture, many recipes include optional crunch-enhancing ingredients.
- Rice Krispies: A light and airy crunch that complements the creamy peanut butter.
- Chopped Nuts: Almonds, pecans, or walnuts can provide additional richness.
- Pretzels: The salty crunch of crushed pretzels offers a delightful contrast to the sweetness.
Other Additions
- Shredded Coconut: Adds a tropical twist and chewy texture.
- Oats: A healthy and hearty option that pairs beautifully with peanut butter.
Flavor Additions
Vanilla Extract
Vanilla extract enhances the overall flavor, adding depth and subtle sweetness.
- Alternatives: Almond or maple extracts can be used for a unique twist.
Spices
Cinnamon or nutmeg can be added for warmth, especially during the holiday season.
Chocolate Coating
Types of Chocolate
Chocolate is essential for the outer layer, adding both flavor and visual appeal.
- Dark Chocolate: Rich and slightly bitter, it balances the sweetness.
- Milk Chocolate: A classic choice for a creamy and sweet finish.
- White Chocolate: Provides a unique, buttery flavor.
Melting Tips
- Double Boiler: Offers the most control and prevents burning.
- Microwave: Use short intervals to melt the chocolate evenly.
Alternatives
- Yogurt Coating: A lighter option.
- Cocoa Powder: Roll the balls in cocoa for a truffle-like finish.
Decorative Toppings
- Sprinkles: Perfect for festive occasions.
- Sea Salt: A pinch of flaky sea salt enhances the chocolate’s sweetness.
- Drizzled Chocolate: Use contrasting chocolate for a decorative touch.
Healthier Variations
Low-Calorie Options
- Replace butter with Greek yogurt or a nut-based alternative.
- Use sugar substitutes like stevia or monk fruit.
Vegan-Friendly Version
- Substitute dairy-based ingredients with plant-based options such as almond butter and vegan chocolate.
Gluten-Free Adaptations
- Ensure all ingredients, including decorations, are certified gluten-free.
Ingredient Sourcing
Finding high-quality ingredients is key to achieving the best results.
- Local Stores: Major grocery chains carry a variety of peanut butter and chocolate options.
- Online Retailers: Specialty items like organic or vegan chocolate can be purchased on platforms like Amazon.
Ingredient Storage
Proper storage preserves the freshness and flavor of your ingredients.
- Peanut Butter: Keep in a cool, dark pantry or refrigerator.
- Chocolate: Store in an airtight container to prevent moisture damage.
Nutritional Breakdown
Each serving provides a balance of fats, proteins, and carbohydrates, making it a satisfying dessert. For a standard recipe, expect around 100–120 calories per ball, depending on the size and ingredients used.
FAQs About Ingredients
- Can I use almond butter instead of peanut butter?
Yes, almond butter works well as a substitute but will alter the flavor. - What’s the best chocolate for coating?
High-quality, semi-sweet chocolate chips are a versatile choice. - How do I prevent my chocolate from seizing?
Avoid water contact and melt it slowly over low heat. - Are there sugar-free options for this recipe?
Absolutely! Use sugar-free peanut butter and erythritol as a sweetener. - Can I make this recipe nut-free?
For a nut-free option, replace peanut butter with sunflower seed butter. - How long do the balls last?
Stored in an airtight container, they stay fresh for up to two weeks.
Conclusion
The quality of your Peanut Butter Balls depends on the thoughtfulness of your ingredient selection. By choosing the right peanut butter, sweeteners, and coatings, you can craft a treat that’s as delicious as it is memorable. Experiment with different textures and flavors to make these balls uniquely yours. Happy cooking!
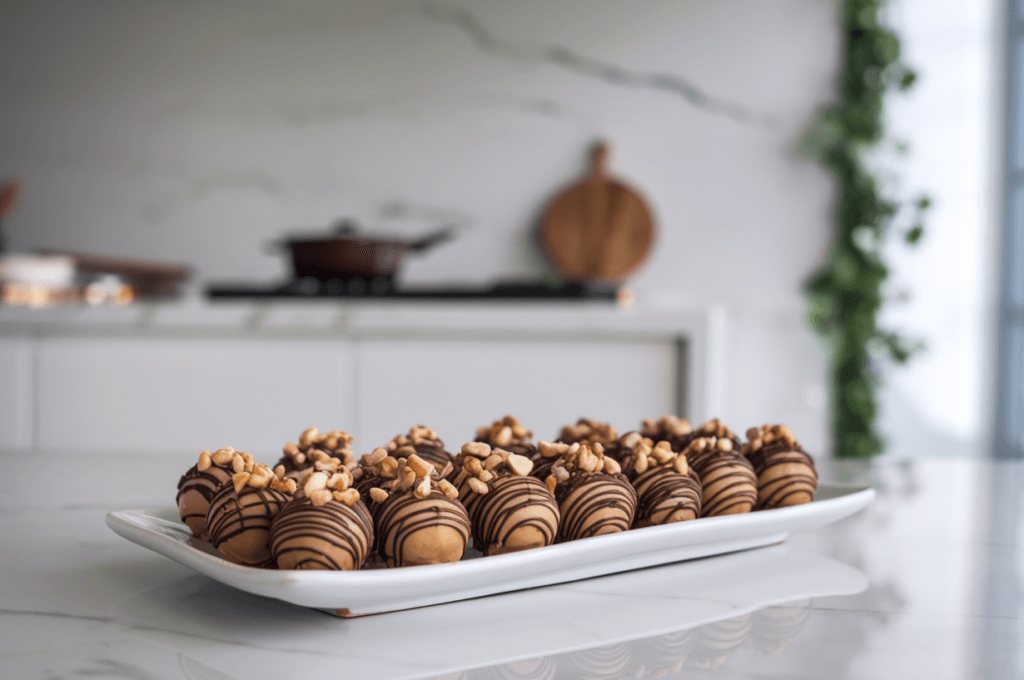
2-Essential equipment
When it comes to making the perfect peanut butter balls, having the right equipment can elevate your recipe from good to extraordinary. This article will guide you through the essential tools needed, helping you create delicious treats while keeping your kitchen experience hassle-free.
Why Proper Equipment Matters in Your Recipe
Using the right kitchen tools ensures that your peanut butter balls turn out consistent, well-shaped, and delicious every time. Quality equipment not only simplifies the process but also guarantees professional results, making your treats more appealing to both the eye and palate.
Mixing Equipment
Mixing Bowls
A good set of mixing bowls is indispensable. Choose stainless steel or glass bowls for durability and versatility. Opt for a range of sizes, as you’ll need larger bowls for mixing peanut butter and powdered sugar and smaller ones for melting chocolate.
Wooden Spoons vs Silicone Spatulas
Both wooden spoons and silicone spatulas are excellent for mixing. Wooden spoons are sturdy and ideal for thick mixtures, while silicone spatulas are flexible, making them perfect for scraping every bit of batter or chocolate.
Measuring Tools
Measuring Cups
Accurate measurements are crucial for achieving the perfect consistency. Use separate measuring cups for dry ingredients like powdered sugar and wet ingredients like peanut butter.
Measuring Spoons
Invest in high-quality measuring spoons to ensure precision. Stainless steel sets are durable and easy to clean.
Molding Tools
Cookie Scoops
Cookie scoops help create uniformly sized balls, ensuring even cooking and a professional appearance. Look for adjustable scoops to accommodate different size preferences.
Rolling by Hand
If you prefer the traditional method, lightly grease your hands with cooking spray to prevent sticking and achieve a smooth finish.
Melting Equipment
Double Boiler
A double boiler is ideal for melting chocolate without burning it. If you don’t own one, you can create a makeshift double boiler by placing a heatproof bowl over a pot of simmering water.
Microwave-Safe Bowls
Choose a microwave-safe bowl for convenience. Look for BPA-free options and ones with a handle for easy pouring.
Dipping Tools
Forks and Dipping Spoons
Forks and dipping spoons help coat peanut butter balls evenly in melted chocolate. Opt for tools with long handles to avoid messy hands.
Chocolate Dipping Sets
For enthusiasts, investing in a chocolate dipping set can make the process smoother and more enjoyable.
Storage Containers
Airtight Containers
Store your finished peanut butter balls in airtight containers to maintain freshness. Glass containers with locking lids are highly recommended.
Freezer Bags
For long-term storage, freezer bags are a cost-effective solution. Label the storage bags with the date to monitor their freshness.
Cleanup Supplies
Non-Stick Mats or Parchment Paper
Place non-stick mats or parchment paper on your workspace to minimize cleanup. These are also great for setting the coated peanut butter balls.
Sponges and Dish Soaps
Use soft sponges and gentle dish soap to clean your tools without damaging them.
Additional Accessories to Consider
Cooling Racks
Cooling racks allow air circulation, helping chocolate coatings set evenly.
Wax Paper
Wax paper prevents peanut butter balls from sticking to surfaces, making them easier to handle.
Budget-Friendly vs Premium Equipment
Whether you’re just starting out or a seasoned pro, there’s equipment for every budget. Basic tools are sufficient for occasional bakers, while premium tools offer durability and precision for frequent use.
Where to Purchase the Best Kitchen Tools
You can find high-quality kitchen tools on websites like Amazon, Walmart, and Target. Local kitchen supply stores also offer unique finds and expert advice.
Equipment Safety Tips
- Always use heatproof tools when melting chocolate.
- If involving kids, opt for child-friendly tools like plastic spatulas and small rolling pins.
Organizing Your Workspace for Peanut Butter Balls
Keep your workspace clean and organized to ensure a smooth cooking process. Arrange tools within reach, and prepare ingredients beforehand.
Equipment Maintenance Tips
Clean and dry all tools thoroughly after use to prevent rust and extend their lifespan. Replace tools like cookie scoops and spatulas when they show signs of wear.
Frequently Asked Questions
1. Can I use regular bowls for mixing instead of stainless steel?
Yes, but stainless steel bowls are more durable and easier to clean.
2. Do I need a double boiler for melting chocolate?
While it’s not essential, a double boiler helps melt chocolate more evenly.
3. Are cookie scoops necessary?
No, but they make the process faster and ensure uniformity.
4. How do I prevent the chocolate from sticking to the dipping tools?
Dip the tools in hot water before use and wipe them dry.
5. Can I freeze peanut butter balls?
Yes, use freezer bags or airtight containers for best results.
6. What’s the best way to clean sticky tools?
Soak them in warm, soapy water for easier cleanup.
3-Step-by-Step Instructions
1. Prepare Your Workspace
Start by clearing a clean, dry space in your kitchen. Line a baking sheet with wax paper or parchment paper. This prevents sticking and makes cleanup a breeze.
2. Mix the Peanut Butter Base
- Combine Ingredients: In a medium mixing bowl, combine the peanut butter, softened butter, and vanilla extract. Use a hand mixer or a wooden spoon to mix until smooth.
- Add Powdered Sugar Gradually: Slowly add the powdered sugar, 1/2 cup at a time, and mix thoroughly. The mixture will become thick and dough-like.
- If the mixture is too sticky, incorporate more powdered sugar gradually.
- If it’s too dry, add a teaspoon of peanut butter.
3. Shape the Balls
- Scoop the Dough: Use a small cookie scoop or a tablespoon to portion out the mixture evenly.
- Roll Into Balls: Roll each portion into a smooth ball using your hands. Place them on the lined baking sheet.
- Chill in the Refrigerator: Refrigerate the peanut butter balls for 20–30 minutes. This firms them up, making them easier to dip in chocolate.
4. Melt the Chocolate
- Set Up a Double Boiler: Place a heatproof bowl over a pot of simmering water, ensuring the bowl doesn’t touch the water. Add the chocolate chips and vegetable oil (if using).
- Melt Until Smooth: Stir continuously until the chocolate is completely melted and silky.
- Alternatively, you can melt the chocolate in the microwave in 30-second intervals, stirring after each round.
5. Dip the Peanut Butter Balls
- Prepare for Dipping: Remove the chilled peanut butter balls from the refrigerator.
- Dip in Chocolate: Using a fork or a toothpick, carefully dip each ball into the melted chocolate. Allow any excess chocolate to drip back into the bowl before placing them down.
- Place on Lined Tray: Set the dipped balls back onto the wax paper-lined tray.
6. Add Garnishes (Optional)
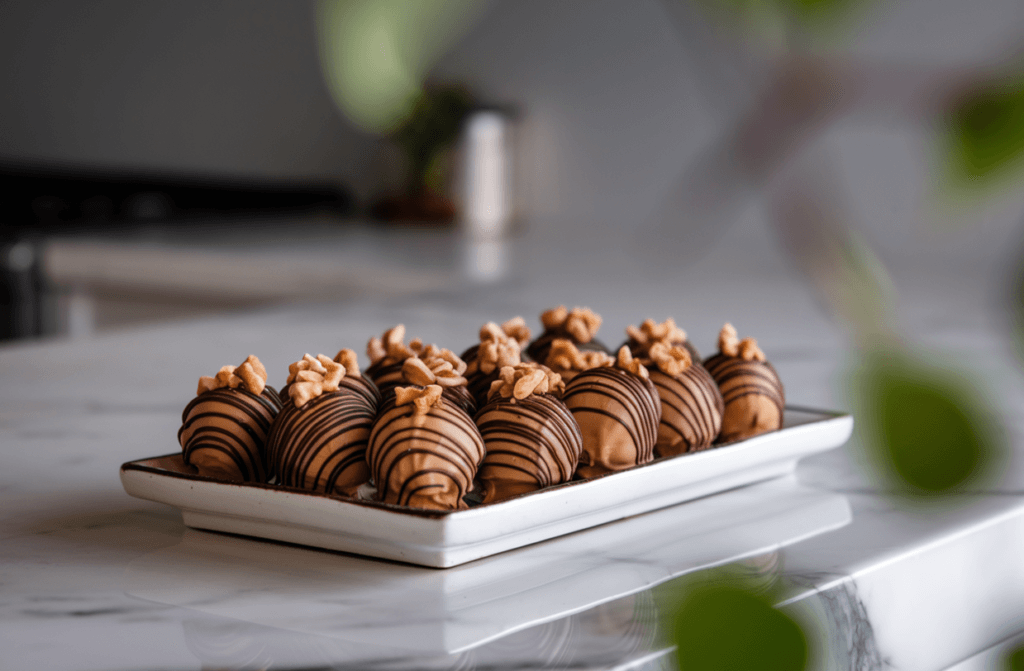
- While the chocolate is still wet, sprinkle crushed peanuts, sprinkles, or sea salt over the top.
- For a striped look, drizzle white chocolate over the balls using a piping bag or spoon.
7. Chill to Set
- Refrigerate Again: Place the tray back into the refrigerator for 30–60 minutes until the chocolate coating hardens completely.
- Test for Readiness: Gently touch one ball to ensure it’s firm.
8. Serve and Enjoy
- Transfer the Peanut Butter Balls to a serving dish or store them in an airtight container.
- Keep them refrigerated for up to two weeks or freeze them for as long as three months.
Tips for the Perfect Peanut Butter Balls
- Use High-Quality Ingredients: Premium chocolate and creamy peanut butter yield the best flavor.
- Adjust Sweetness: If you prefer less sweetness, reduce the powdered sugar slightly.
- Avoid Overheating Chocolate: Overheated chocolate becomes grainy. Always melt it gently.
- Work Quickly: Chocolate hardens fast, so dip and garnish promptly.
Why Americans Love Peanut Butter Balls
These bite-sized treats are a nostalgic favorite across the USA. They combine the creamy, nutty flavor of peanut butter with the rich sweetness of chocolate, creating an irresistible dessert. Perfect for holidays, parties, or a quick indulgence, Peanut Butter Balls are loved for their simplicity and decadence.
Frequently Asked Questions
1. Can I Use Crunchy Peanut Butter Instead of Creamy?
Yes! Crunchy peanut butter adds a delightful texture, but the balls may not be as smooth.
2. Can I Make These Dairy-Free?
Absolutely. Replace butter with coconut oil and use dairy-free chocolate chips.
3. Why Is My Chocolate Coating Lumpy?
This happens if the chocolate isn’t fully melted or has been overheated. Stir well and add a teaspoon of vegetable oil for smoothness.
4. How Do I Store Peanut Butter Balls?
Use an airtight container to store the treats in the fridge for up to two weeks. Separate layers with wax paper to prevent sticking.
5. Can I Use White Chocolate Instead?
Definitely! White chocolate creates a stunning contrast and works well for holiday themes.
6. Are Peanut Butter Balls Gluten-Free?
Yes, as long as your ingredients (like powdered sugar and chocolate) are certified gluten-free.
Conclusion
Making Peanut Butter Balls is a fun and rewarding process, and the results are sure to impress. These no-bake delights are perfect for sharing with friends and family or indulging in a sweet treat for yourself. With this detailed guide, you’ll master the art of crafting these irresistible desserts.
4-What Are Peanut Butter Balls?
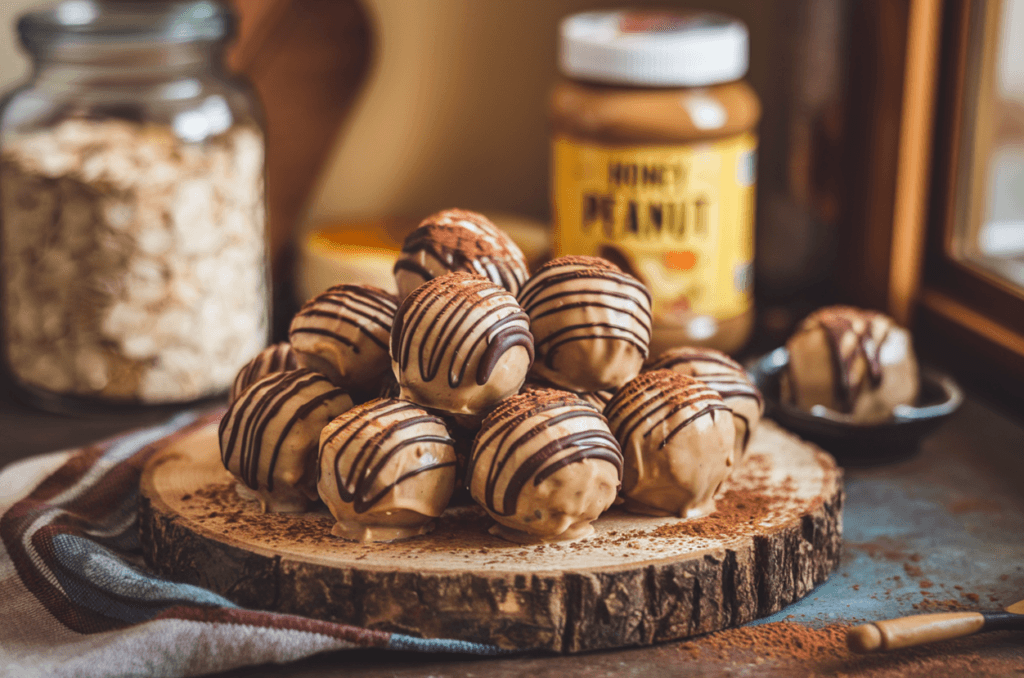
Peanut Butter Balls are small, round confections made from a mixture of peanut butter, powdered sugar, and butter, coated in a layer of melted chocolate. Popular for their simple ingredients and no-bake preparation, these treats are often associated with holidays like Christmas but are perfect for any occasion.
Their creamy, nutty interior and rich chocolate shell make them a crowd-pleaser at parties, bake sales, and family gatherings. They are easy to make and even easier to eat, which is why they remain a staple in many American households.
Key Ingredients
To prepare Peanut Butter Balls, you’ll need:
- Peanut Butter: Creamy peanut butter is the go-to choice, but crunchy varieties work too if you want added texture.
- Powdered Sugar: This acts as a sweetener and thickener, giving the balls their structure.
- Butter: Adds richness and helps bind the mixture.
- Chocolate Chips: For the decadent outer coating, semi-sweet or dark chocolate is recommended.
- Optional Additions: Vanilla extract, crushed nuts, or shredded coconut can be included for extra flavor.
Step-by-Step Guide to Making Peanut Butter Balls
Ingredients:
- 1 cup of peanut butter
- 1/4 cup of softened butter
- 2 cups of powdered sugar
- 1 teaspoon of vanilla extract (optional)
- 1 1/2 cups of semi-sweet chocolate chips
- 1 tablespoon of coconut oil (optional, for smoother chocolate coating)
Instructions:
- Mix the Base:
- In a large bowl, combine the peanut butter, softened butter, and vanilla extract (if using).
- Gradually add powdered sugar, mixing until the dough is firm but pliable.
- Form the Balls:
- Shape the mixture into 1-inch balls and set them on a wax paper-lined baking sheet.
- Chill:
- Chill the balls in the refrigerator for about 30 minutes to firm them up. This step ensures they hold their shape during dipping.
- Prepare the Chocolate Coating:
- Melt the chocolate chips in a microwave-safe bowl, stirring every 20 seconds to prevent burning.
- Add coconut oil for a glossy finish, if desired.
- Dip the Balls:
- Using a fork or toothpick, dip each ball into the melted chocolate, ensuring it is evenly coated.
- After coating, place the chocolate-covered balls back on the wax paper.
- Set and Serve:
- Refrigerate the coated balls for an additional 30 minutes until the chocolate hardens.
- Serve immediately or store as directed.
Tips for Perfect Peanut Butter Balls
- Use Chilled Ingredients: Cold peanut butter and butter make the dough easier to handle.
- Avoid Overmixing: Overworking the dough can make the balls too soft to hold their shape.
- Use High-Quality Chocolate: A good-quality chocolate enhances the flavor and texture.
Storing and Serving Suggestions
- For refrigeration, use an airtight container to keep them fresh for up to two weeks.
- Freezing: Freeze the balls for up to three months. Thaw in the fridge before serving.
- Presentation: For special occasions, drizzle melted white chocolate or sprinkle sea salt on top for a gourmet touch.
FAQs About Peanut Butter Balls
- Can I make them without butter? Yes! Substitute coconut oil or skip the butter entirely for a firmer texture.
- Are they gluten-free? Yes, as long as you use gluten-free ingredients.
- What if I don’t have chocolate chips? Use baking chocolate or even candy melts as an alternative.
- Can I use natural peanut butter? While possible, natural peanut butter may result in a softer consistency. Add more powdered sugar to adjust.
- How many servings does this recipe make? Approximately 24 balls, depending on their size.
- What’s the best way to melt chocolate? Use a double boiler or microwave in short intervals to prevent scorching.
Conclusion
Peanut Butter Balls are the epitome of easy, no-bake desserts. With their simple ingredients, quick preparation, and irresistible taste, they’ve become a staple in American kitchens. Whether you’re making them for a holiday gathering or a midweek snack, these treats are guaranteed to impress.
5-Nutritional value and calories
Peanut Butter Balls are a beloved snack across the United States, known for their delightful combination of sweet and savory flavors. Whether enjoyed as a quick energy boost or a decadent treat, these bite-sized snacks pack a surprising nutritional punch. This article delves into the detailed nutritional values and caloric breakdown of Peanut Butter Balls, along with insights on their health benefits, ingredients, and ways to make them healthier.
Ingredients of Peanut Butter Balls
Common Ingredients Used
Peanut Butter Balls are typically made with:
- Peanut Butter: A rich source of protein and healthy fats.
- Powdered Sugar: Adds sweetness but increases the calorie count.
- Butter: Provides creaminess and flavor.
- Graham Crackers (optional): Adds texture and a mild flavor.
- Chocolate Coating: Commonly used for an indulgent finish.
Healthier Ingredient Substitutions
To reduce calories and enhance nutritional value:
- Use natural peanut butter without added sugar.
- Substitute powdered sugar with honey or maple syrup.
- Replace butter with coconut oil or skip it entirely.
- Use dark chocolate (70% or higher) for coating instead of milk chocolate.
Nutritional Value of Peanut Butter Balls
Macronutrients
A standard serving of Peanut Butter Balls (approximately 2 pieces) provides:
- Calories: 180–220 (depending on ingredients)
- Carbohydrates: 15–20 grams
- Protein: 5–7 grams
- Fat: 10–15 grams
Vitamins and Minerals
- Vitamin E: Found in peanut butter, supports skin and immune health.
- Magnesium: Aids muscle function and energy production.
- Iron: Boosts red blood cell production.
- Potassium: Supports heart health.
Caloric Breakdown
Calories Per Ingredient
- Peanut Butter (2 tbsp): ~190 calories
- Powdered Sugar (2 tbsp): ~90 calories
- Butter (1 tbsp): ~100 calories
- Dark Chocolate (1 oz): ~150 calories
- Graham Crackers (2 sheets): ~60 calories
By tweaking the recipe, the calorie count can be adjusted significantly.
Calories Per Serving
One Peanut Butter Ball (weighing ~20g) typically contains:
- 90–110 calories for standard recipes.
- 70–80 calories for healthier variations.
Health Benefits of Peanut Butter Balls
Protein-Rich Snack
The protein in peanut butter supports muscle repair and provides long-lasting energy.
Healthy Fats for Energy
Peanut butter and dark chocolate contain unsaturated fats that help maintain energy levels and promote heart health.
Are Peanut Butter Balls a Healthy Snack?
Comparison with Other Snacks
Compared to store-bought candy bars or cookies, Peanut Butter Balls have fewer processed ingredients and more nutritional benefits.
Portion Control and Balance
While nutritious, the calorie density of Peanut Butter Balls requires moderation. Sticking to 1–2 pieces per serving is ideal.
Making Healthier Peanut Butter Balls
To create a guilt-free version:
- Reduce sugar by incorporating unsweetened cocoa powder.
- Add chia seeds or protein powder for extra nutrients.
- Use gluten-free graham crackers or skip them for a lower-carb option.
How to Fit Peanut Butter Balls Into a Diet Plan
Pre-Workout Snack
Peanut Butter Balls provide a balanced mix of carbs and fats, making them an excellent pre-workout snack.
Meal Prep
Incorporate them into weekly meal prep as a quick grab-and-go option for busy days.
FAQs About Peanut Butter Balls
- Is Peanut Butter Healthy?
Yes, peanut butter is rich in protein, healthy fats, and essential vitamins, but moderation is key due to its calorie density. - Can I Make Peanut Butter Balls Keto-Friendly?
Absolutely! Use unsweetened peanut butter, erythritol as a sweetener, and dark chocolate. - Are Peanut Butter Balls Suitable for Kids?
Yes, they are a fun and nutritious snack for children, but avoid adding too much sugar. - What’s the Ideal Portion Size?
One or two balls per serving is perfect for enjoying them without overindulging. - Can I Use Almond Butter Instead?
Yes, almond butter works as a great substitute for peanut butter, with slightly fewer calories. - What Are Low-Calorie Variations?
Opt for unsweetened ingredients and reduce chocolate coating for a lighter snack.
Conclusion
Peanut Butter Balls are a versatile and delicious snack loved by many. While they can be high in calories, their nutritional benefits make them a smart choice when consumed in moderation. By using healthier ingredients and sticking to proper portion sizes, you can enjoy Peanut Butter Balls guilt-free.
6-Tips and variations
Peanut Butter Balls are a timeless treat adored by people of all ages, especially in the United States. These bite-sized delights are versatile, easy to make, and can be customized to fit various occasions. In this article, we’ll dive into expert tips for perfecting your Peanut Butter Balls, as well as explore creative variations to elevate this classic dessert.
Key Tips for Making Perfect Peanut Butter Balls
1. Use High-Quality Peanut Butter
The star ingredient in Peanut Butter Balls is, of course, peanut butter. Choosing the right type is essential for both flavor and texture. Opt for creamy peanut butter for a smooth and cohesive mixture. If you prefer a chunkier texture, natural or chunky peanut butter can work well but may require adjustments to the recipe to ensure the mixture binds properly.
- Pro Tip: Avoid peanut butter that is too oily or runny, as this can make the mixture difficult to shape.
2. Balance Sweetness and Saltiness
The balance between the sweetness of powdered sugar and the saltiness of peanut butter is crucial. Adjust the powdered sugar quantity according to your taste, ensuring the sweetness does not overpower the peanut butter’s natural flavor.
- Pro Tip: If you’re using unsalted peanut butter, add a pinch of salt to enhance the overall taste.
3. Choose the Right Chocolate Coating
Melting chocolate is a critical step in creating the perfect shell for your Peanut Butter Balls. High-quality dark, milk, or white chocolate works beautifully. To ensure a smooth finish:
- Melt the chocolate using a microwave or a double boiler for smooth results.
- Add a teaspoon of coconut oil or shortening to the melted chocolate to give it a glossy, professional finish.
4. Chill the Mixture Before Shaping
A chilled peanut butter mixture is much easier to roll into balls. After mixing the peanut butter, powdered sugar, and butter, refrigerate the mixture for at least 30 minutes. This step ensures your hands stay clean and the balls maintain their shape.
- Pro Tip: If the mixture is still sticky after chilling, dust your hands with powdered sugar before rolling.
5. Master the Dipping Process
The chocolate coating process can be tricky, but it’s the key to beautiful Peanut Butter Balls. Use a fork or toothpick to dip the peanut butter balls into the melted chocolate, allowing any excess to drip off before placing them on a lined tray.
- Pro Tip: Tap the fork gently on the side of the bowl to remove excess chocolate and avoid pooling on the tray.
6. Store Properly
Proper storage is essential for maintaining the freshness and texture of Peanut Butter Balls. Place them in an airtight container, separating layers with parchment paper, and store them in the refrigerator.
- Pro Tip: Peanut Butter Balls can also be frozen for up to three months. Simply thaw in the refrigerator before serving.
Creative Variations to Try
1. Add Crunch with Mix-Ins
Enhance the texture of your Peanut Butter Balls by incorporating mix-ins like crushed pretzels, rice cereal, or chopped nuts. These add a delightful crunch and extra flavor.
2. Infuse Unique Flavors
Experiment with different flavor profiles by mixing in extracts like vanilla, almond, or even maple syrup. For a festive twist, add a dash of cinnamon or pumpkin spice to the peanut butter mixture.
3. Go Gluten-Free or Vegan
To make Peanut Butter Balls gluten-free, ensure all ingredients, including chocolate, are certified gluten-free. For a vegan version, replace butter with coconut oil or a plant-based butter alternative, and use dairy-free chocolate.
4. Decorate for Special Occasions
Customize your Peanut Butter Balls to match holidays or celebrations. Sprinkle them with colored sugar, drizzle with contrasting chocolate, or top with seasonal decorations like candy canes or mini sprinkles.
5. Try a Healthier Version
For a lighter version, use natural peanut butter, reduce the powdered sugar, and dip the balls in dark chocolate. You can also add chia seeds or flaxseeds for a nutritional boost.
6. Layer with Other Ingredients
Create a layered treat by adding a small marshmallow or caramel square to the peanut butter mixture before dipping it in chocolate. This transforms the traditional Peanut Butter Ball into a luxurious dessert.
Why Americans Love Peanut Butter Balls
Peanut Butter Balls hold a special place in American hearts due to their rich, nostalgic flavor and ease of preparation. Whether served during holidays, family gatherings, or as an everyday treat, they remain a crowd-pleaser.
7-FAQ sur les Peanut Butter Balls
1. Can I use another type of nut butter?
Yes, almond or hazelnut butter works just as well.
2. How long can I keep these balls?
Store them in an airtight container in the fridge, where they’ll stay fresh for up to two weeks.
3. Can I freeze them?
Absolutely, they freeze very well and will keep for up to 3 months.
4. Can I reduce sugar?
Yes, but it might affect the texture. Substitute with powdered sweetener if needed.
5. Can I add peanut pieces?
Sure! It will add a nice crunchy texture.
6. Is this recipe suitable for children?
Yes, it is ideal, but make sure they are not allergic to nuts.
Delightfully Nutritious Quinoa-Stuffed Peppers
Setting the Scene Imagine an evening that feels just a bit magical, as the sunset casts a warm golden glow through your kitchen window. The tantalizing aroma of spices fills … Contunue reading
Jalapeno Popper Egg Rolls
Setting the Scene Imagine a cozy gathering of friends, laughter echoing off the walls, and the tantalizing aroma of fried snacks wafting through the air. It’s a perfect evening to … Contunue reading
Low-Cal Mozzarella Sticks: A Guilt-Free Indulgence
Setting the Scene Picture this: a cozy evening at home, the scent of something delicious wafting through the air, and laughter filling the room. That’s what you’ll experience when you … Contunue reading


